
Accounting invoices have a crucial significance in an organization. If Sage 50’s invoicing feature isn’t working properly, it could have an effect on the company’s operations. It demands promptness and precision since if these are lacking, the cash flow will suffer. The invoicing errors include omissions, misunderstandings, typographical errors, repeated billing problems, and inaccurate information. If you have already installed Sage 50 Add Invoice in your company’s accounting software, you’ll learn the best possible way to troubleshoot the Sage 50 Missing Invoice error.
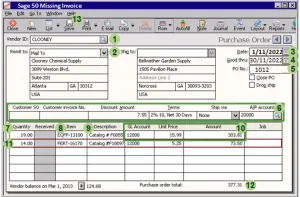
What do you Understand with Sage 50 Missing Invoice Error?
There may be a danger of missing invoices if the Sage 50 invoices are not received by the designated recipients or automatically configured. Invoices are automatically applied to a 30 day period in the Sage 50 date range for both the sales invoice and the purchase invoice. Therefore, if you produce the invoice without including this range, it will not appear on the list. You need to change the date in order to correct this. To learn more about the additional reasons for missing or damaged invoices in Sage 50.
Suggested Reading: Sage Not Showing all Transactions
Reasons Behind the Sage 50 Missing Invoice Error
There are a number of reasons behind the occurrence of Sage 50 Missing Invoice error.
The below listed are few of them:-
- Damaged folder
- Making multiple changes to an invoice could lead to an improper posting
- Corrupted transaction
- The incorrect data range could be the reason of the missing invoice.
Troubleshooting Solutions to Fix the Sage 50 Missing Invoice Error
Well, you’re aware of the error and reasons behind it. Now, it’s time to discussed the troubleshooting solutions to overcome the Sage 50 Missing Invoice error.
Solution 1: Examine the Invoice list to see if the Filter has been Applied
Here are the procedures to do if the filter was set to the invoice list in order to hide the invoices:-
- Initially, search for the “Invoices and Credits” module
- Next, click on the Filter button
- On the screen’s top, select Clear Form
- Hit the “Apply” button
- Pick the “Close” tab
- If the invoice is still not shown, hit the “No” button again to refresh the list.
Suggested Reading: Sage 50 DLL Error
Solution 2: Execute Fundamental Troubleshooting Procedures
- In the beginning, examine the date range
- If the data range is not the root of the problem, look in the account’s fast entry invoice page to see if any invoices may have been created as QEs, which specify that the invoices won’t show up in the usual invoice window. To determine whether the quotes and invoice conversion occurred, you could also check the quotes & estimates option. These are the actions:
- Once you’ve found the Sales button, click the Sales Invoices/Purchases button
- A purchase invoices tab should be selected
- The invoice date can be added by adding the “from” and “to” date parameters
- When you click “More”, double-check that the status drop-down box is set to the All tab
- At last, choose the Search option.
Solution 3: Resolve the Damaged Invoice
- Find the maintenance button
- Select the Advance Database Check menu item
- Select File from the menu
- Click the Save As button
- Fill in the file name in the test tab
- It will reveal the sales order, which could be the root of the problem
- Convert it into an invoice after removing the item line
- Now, post the invoices
- You must delete the corrupted inventory item if it posts successfully
- Change the item name in the inventory to Do not use during invoice posting
- Create a new item in the list called inventory, and then embed it to change the actual order
- Post the invoice once again.
If you have any specific query, also get in touch with the experts of Sage 50 Live Chat 24x7 Helpdesk.Solution 4: Run the Tidy up Process on the Data
The steps are as follows:-
- Click the Find File button
- Select “Maintenance” from the menu
- Click Recovery Tools
- Create a backup if a pop-up appears
- Select “Re-index & Compress All” from the menu
- Hit the Ok button
- Click the Close button
- If a box asking for data verification appears, select the “Yes” button
- If there are no issues, check the bills & credit module for any missing invoices.
Solution 5: Run the Integrity Check-in Sage 50
- Select the File button
- Select Backup from the menu
- Make the name change
- Choose Integrity Check from the Support Utilities menu after selecting the Help tab
- Select the option to Continue
- The Re-index files button should be checked
- Then, select “Chart” from the list that says “Reindex”
- Hit the Ok button
- After that, you have to set the following items:
- Jrnl Rows
- Vendor
- Customer
- Employee
- Jrnl Header
- Once again, hit the Ok button
- At last, try creating your data restore.
Suggested Reading: Sage 50 Company File Check and Repair
Solution 6: Restore Data Backup to Fix the Missing Invoice
- Initially, update your Sage 50 if it is not already running
- Click the Restore button after locating the File selection
- Select the folder and any existing data you want to restore
- Once the proper.ptb file has been selected, click “Next”
- Select “New Company Restoration” by clicking on it
- After displaying the Restore option, it will list the files you need to restore
- Click the “Transactions” checkbox to restore the backup forms, including those that are missing
- Choose the report titled “Intelligence Reporting” to restore the reports
- Once done with that, click the “Next” button
- Finally, click on the Finish tab.
Conclusion
With the above-discussed techniques, it is feasible to eliminate the Sage 50 Missing Invoice error. However, there may be situations in which you are unable to correct such an issue.
A Frequently Asked Questions (FAQs)
One user working in the Sage 50 company file’s non-shared copy while the other user has been working in the system’s RDA-shared file copy, missing file journal entries, or if the back has not been re-shared to Remote data access are only a few causes of the missing invoice in Remote data access.
The steps you must take are listed below:-
1. Discover the most recent version of the folder
2. Take a look at the advanced journal entry number
3. Give the file a new name
4. After that, share it once more with Remote Data Access
5. Stop sharing the firm file with remote data access if you find the file
6. Download the file once again to the PC of the secondary user
7. When utilizing Sage Drive, be sure to wait to alert the actual generator uploader before restoring the manual backup
8. In order for backup restore to fail, remote data access was built
Open the file
9. Sage 50 will then remember the requirements for shared files on the remote data access
10. Perform a right-click the Sage 50 data file missing by first clicking it
11. Click on the “Send to” option
12. Once done with that then select the Desktop option
13. The Remote data access indications will show up on all systems each time you run Sage 50.
The below are the steps need to be performed if I have to restart the module to resolve the missing invoice problem in Sage 50 Support:-
1. The very first, find the Setup button
2. Select the User Preferences tab
3. Click on the View option
4. Remove the selected module from consideration
5. After that, select on the Ok button
6. Now, quit the Sage software
7. In the end, reopen the program.
The below steps help you to correct the missing invoice in Sage 50 by re-entering the invoice:-
1. Make sure all of the clients are embedded
2. Open the historical transactions button
3. Select the Invoices button
4. After entering the necessary information, select the “Record” option
5. Once you’ve finished including the client’s previous invoice
6. Select the “Close” button from the menu
7. Change the receipt number that is entered there
8. Select the “Close” button
9. Finally, press the “Close & Save” button.