
Introduction: Sage 50 Export and Import Account Data Using CSV Format
Sage 50 is known accounting software that enables users to handle their financial records. While Sage 50 mainly uses its own proprietary file structure (.SAJ) for keeping accounting data, it also delivers options to import and export data using other file designs, like CSV (Comma-Separated Values) Export and Import Account Data Using CSV Format in Sage 50.
CSV is a mostly used format for representing tabular data, and it can be efficiently created and revised using spreadsheet software such as Microsoft Excel or Google Sheets. Sage 50 permits users to import and export data in CSV format, making it suitable to work with external applications or swap data with other methods.
What is CSV Format in Sage 50?
In Sage 50, the CSV (Comma-Separated Values) format refers to a common file format used for importing and exporting data. CSV files store tabular data, such as spreadsheets or databases, in plain text format. Each line in the file represents a row of data, and each field within a row is separated by a comma or another delimiter.
Purposes of CVS in Sage 50
1. Importing data: You can import CSV files into Sage 50 to quickly add or update information. For example, you can import a CSV file containing customer details, inventory items, or general ledger transactions.
2. Exporting data: You can export data from Sage 50 to a CSV file for use in other applications or for analysis purposes. For instance, you can export sales data, vendor information, or financial reports to CSV format.
3. Integration: CSV files can be used to integrate Sage 50 with other software applications or systems. By exporting data from Sage 50 to CSV format, you can facilitate data exchange and synchronization between different systems.
To work with CSV files in Sage 50, you have options to define the delimiter character (like comma, semicolon, or tab) and map the fields in the CSV file to the corresponding fields in Sage 50.
It’s worth noting that while CSV files are mainly used, supported and flexible format, they have some limitations. For instance, they do not support complex data structures or formatting beyond simple text and numbers. Additionally, CSV files may require careful handling of special characters or data types to ensure accurate importing or exporting of data.
How to Export and Import Account Data Using CSV Format in Sage 50?
To Export Account Data Using CSV Format in Sage 50
- Open Sage 50 and log in to your company file.
- Navigate to the module or section where your account data is stored. For example, to export the chart of accounts, go to the “Accounts” or “Chart of Accounts” section.
Suggested Reading: Sage 50 Company File Check and Repair
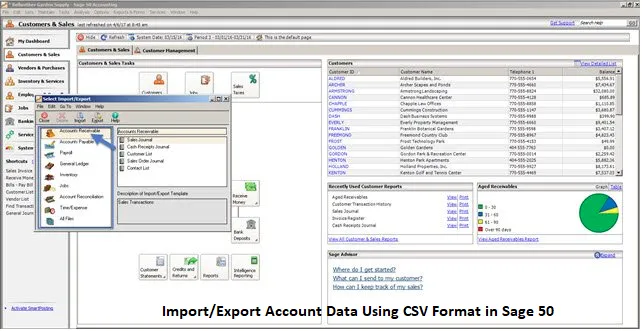
- Look for an option or feature that enables you to export data. In Sage 50, this is found in the menu bar/toolbar, often labeled as “Import/Export“.
- Select the suitable export option and name the chosen file format as CSV.
- Choose the particular account data you want to export. This may require selecting full accounts, date ranges, or other criteria based on your needs.
- Provide a file name and location to save the exported CSV file.
- Review the export settings and make any needed adjustments.
- Start the export process. Sage 50 will produce a CSV file holding your selected account data.
Read more: To get the best assistance regarding the Export and Import Account Data Using CSV Format in Sage 50, you can simply dial +1-347-967-4079 to contact our Sage 50 live chat Specialists Team.
To Import Account Data Using CSV Format in Sage 50
- Create a CSV file with the account data you want to import. The file must have a header that specifies the column names (like Account Code, Account Type, etc.). Each row should contain the corresponding data for each account.
- Open Sage 50 and log in to the company file with the credentials.
- Monitor the “File” menu and choose “Import/Export.”
- In the Import/Export Wizard, choose “Import Records” and then click “Next.”
- On the next screen, click “CSV” as the file type you want to import, and then click “Next.”
- You will be presented with a list of available Sage 50 fields and ask you to map them to the corresponding CSV columns. Match each CSV column to the suitable Sage 50 field by choosing the corresponding field from the dropdown menu.
- After mapping all the fields, check the mappings to make sure they are correct.
- In this step, you can choose additional import options like handling duplicates, updating existing records, or skipping blank values. Select the right options based on your requirements.
- Once you are sure of the mappings, click “Next” to initiate the import process.
- After the import is complete, check the imported accounts in Sage 50 to check that the data is correct and complete.
Suggested Reading: Convert Sage 50 Data to Newer Version

Conclusion
Once you have exported or imported the account data to a CSV file, you can open it in a spreadsheet application like Excel or Google Sheets to check and edit the data if needed. You can also import this CSV file into another accounting software or use it for inspection, reporting, or integration with other systems.
It’s vital to note that the same steps and options may vary depending on the version of Sage 50 you are using. It’s always a good idea to consult the Sage 50 documentation or contact their Sage 50 live chat support team for detailed instructions that match your software version.
Frequently Asked Questions
Ans. Full form of CSV Comma-Separated Values. It is a simple text file format often used to store tabular data, where each line portrays a row and the values within each line are parted by commas.
Ans. Yes, there are some limitations and considerations to bare in mind when working with CSV files in Sage 50:
● CSV files should follow a specific format, where each field value is separated by a comma and enclosed in quotation marks if it contains special characters, such as commas or line breaks.
● Assure the CSV file’s column headers match the field names in Sage 50 to make sure the right data mapping during import.
● Sage 50 may have particular requirements for some fields, like data formats or character limits. Make sure your CSV data comply with these needs.
● When importing large amounts of data, it’s advisable to test the import process on a smaller sample first to verify the mapping and review for any possible issues.
Always take a backup of your data before performing any import or export operations to avoid accidental data loss or corruption.
Ans. Sage 50 does support batch processing using CSV files. You can prepare a CSV file with multiple rows of data and import it into Sage 50 to update or create multiple records simultaneously. However, the specific batch processing capabilities may vary depending on the module and version of Sage 50 you are using. It’s recommended to consult the Sage 50 documentation or contact their support for detailed instructions on batch processing using CSV files.
Ans. Yes, Sage 50 offers multiple import and export formats along with CSV. Some of the commonly used alternatives are Microsoft.